Harvesting and Drying Herbs for the Home Apothecary
Building the home apothecary with your own hand-harvested and dried herbs is one of the most satisfying parts of home herbalism. Watching your shelves gradually fill with mason jars filled with the year’s herbal bounty provides a deep sense of satisfaction, especially as the wheel of the year starts to turn towards late summer, and then inevitably fall and winter again. But for experienced herbalists and beginners alike sometimes challenges can come-up in the process. This post provides a guide to proper harvesting and drying methods that I’ve learned throughout the years- along with a section on troubleshooting when things don’t go quite as expected- with the hopes that it will encourage you to start harvesting and drying you own herbs and also increase your success rate if you already do!
First, a few basics….
When it comes to harvesting and drying herbs for the home apothecary there are a few things to take into consideration:
The main impediment to properly drying herbs is moisture. Be sure to harvest plants free of residual surface moisture from rain or dew. It is not advised to wash your plant material (the exception being roots- see below) before drying for this reason.
For plants with a high essential oil content, the peak time to harvest them in terms of essential oil concentration is mid-morning a little before noon, however it’s not necessary if you’re not able to harvest in that window- don’t let that stop you if you have the time and plant is ready to harvest!
The main qualifications for proper drying are warmth (but not excessive heat), good ventilation, and dryness, so any space that meets those qualifications will do!
Herbs you harvest and dry yourself often far exceed the quality of anything you can purchase and have a much longer shelf-life too, and although it’s very labor-intense and has many steps from start to finish, the results are always worth it.
BEFORE WE DIVE-IN, A QUICK NOTE ABOUT HARVESTING YOUR OWN HERBS:
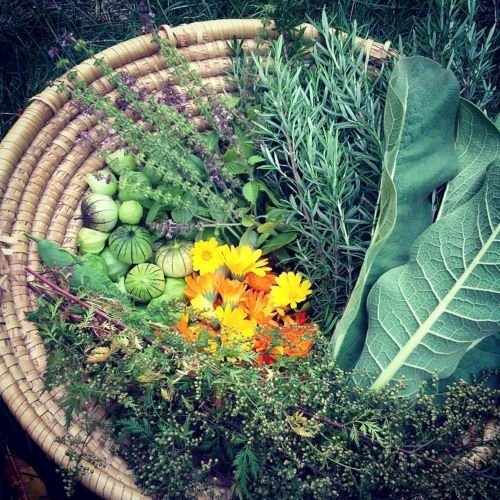
It’s really easy to get over-excited and, therefore, over-harvest when you’re harvesting your own herbs- either in the wild or from your garden. Remember to always only harvest not only what you think you will need but also only what you think you’ll be able to PROCESS- meaning drying, storing, make into medicine, etc. As you will see the process of drying herbs can be time-consuming and its easy to get overwhelmed if you simply have too much plant material to deal with. Taking care to harvest reasonable amounts will result in more joy and less stress in the process of harvesting and drying your own herbs for home use!
Guide to Harvesting & Drying Your Own Herbs
Flowers
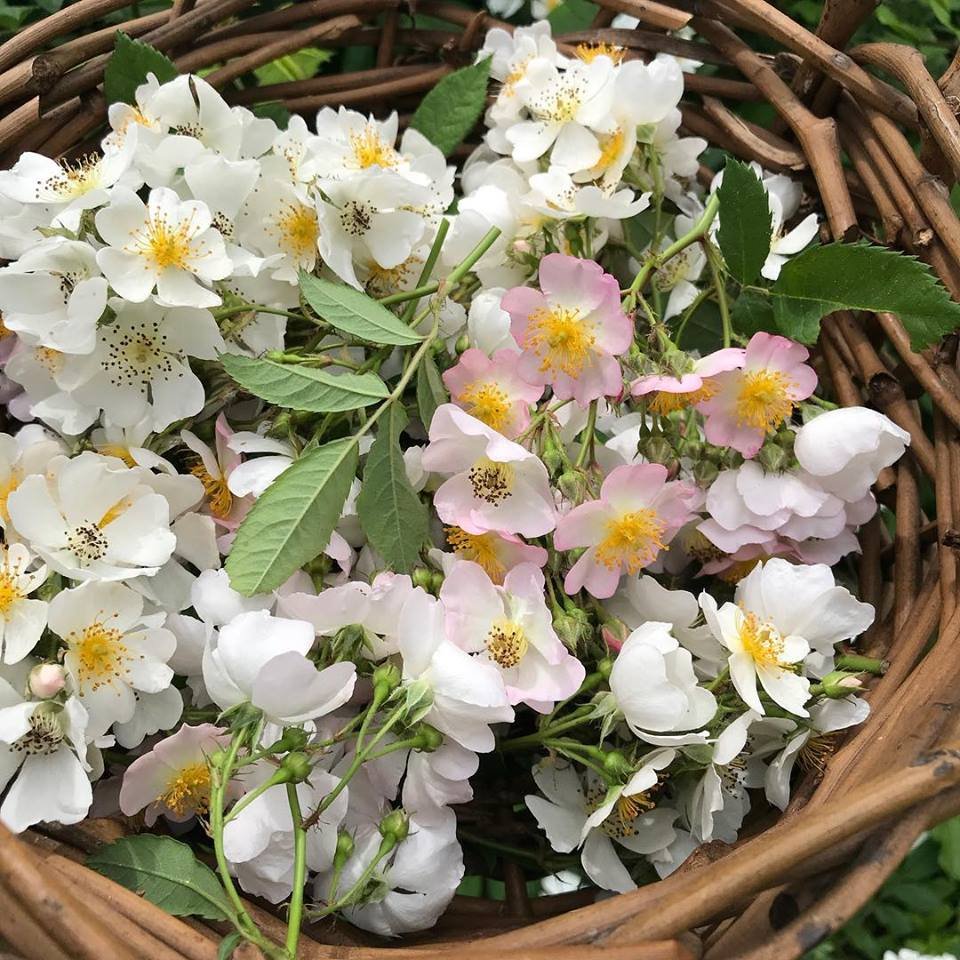
Flowers can pose a particular challenge when drying due to their tendency to have lots of residual moisture hiding in their petal folds. For this reason it is especially important to be sure there is no residual moisture on them and I usually try to harvest them in a period when it hasn’t rained for few days. I like to dry my flower either on screens or in baskets that have a loose weave. The idea here is that you want lots of ventilation- you can even have a fan blowing on them for even more ventilation. For a screen, an old window screen will do- you can prop it up on some bricks or even books so there is ventilation underneath in addition to above. If you’re using a basket, give it a nice shake every day so the plant material dries evenly. If you’re using a screen simply run your hands gently over the flowers now and then. In optimal conditions they will be dry in about a week. Flowers often contain delicate essential oils easily degraded by heat and exposure so I advise getting them into a jar as soon as you can once they’re dry and trying not to let them sit-out for too long if possible. The flowers should be completely dry before they are stored- they should crumble in your hand. Due to their delicate nature flowers are best stored in glass jars. Some of my favorite flowers to dry in this manner are Wild Rose (Rosa multiflora)- pictured, Calendula (Calendula officinalis), and Red Clover (Trifolium pratense).
Mushrooms
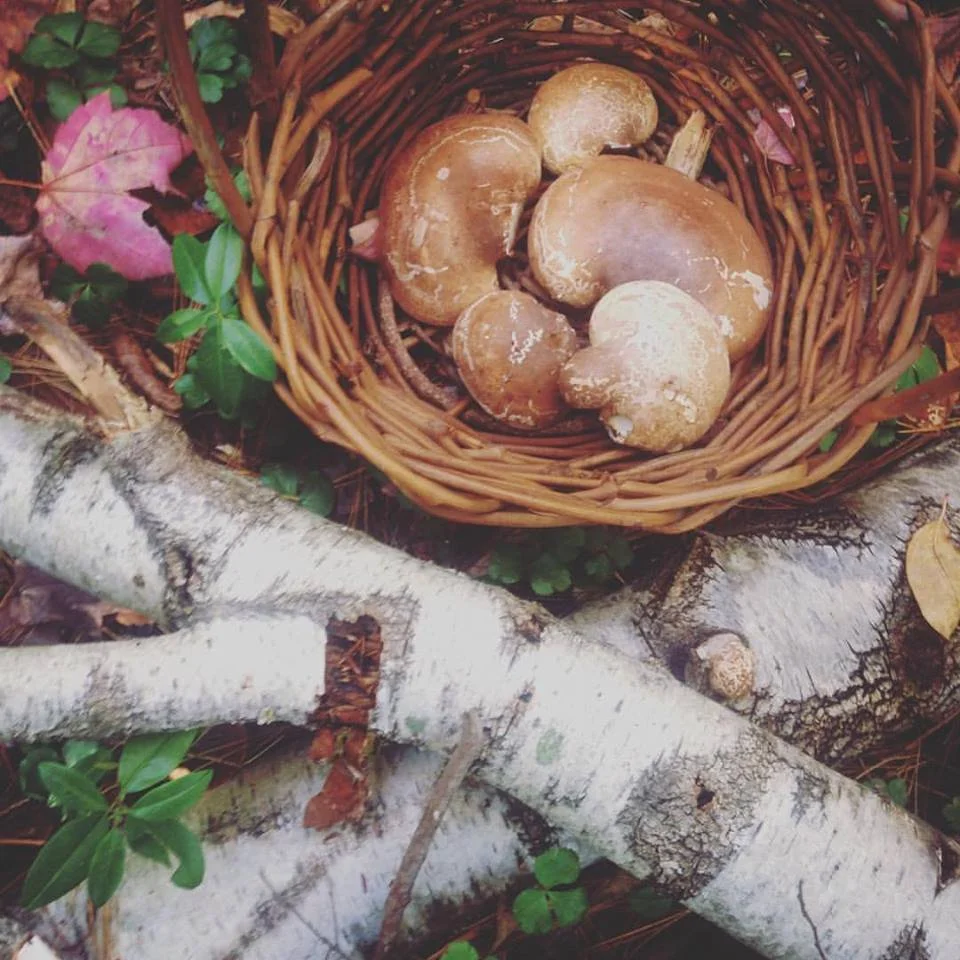
The best method for drying mushrooms depends on what type of mushroom they are. Polypore mushrooms that grow from trees, such as Turkey Tail (Trametes versicolor), Birch Polypore (Fomitopsis betulina)- pictured, Reishi (Ganoderma lingzhi, G. lucidum, G. tsugae), and Artists Conk (Ganoderma applanatum) are best dried on screens, in baskets with loose weave, or on wooden cutting boards. They should be chopped into very thin slices for ease of use for teas, broths, etc while they are fresh because they will become rock hard once they dry. Turkey Tails can just be dried whole. It’s not recommended to wash these prior to drying and since they grow on trees there’s often not any excess of dirt to deal with. Be sure the pieces snap in half (to indicate dryness) before storing in glass jars or Ziploc freezer bags. Mushrooms that have a more soft and pliable nature, such as Morels (Morchella spp), Wood Ears (Auricularia auricula, A. americana, A. polytricha, A. auricula-judae, Hirneola auricula-judae), Chicken of the Woods (Laetiporus sulphureus, L. conifericola, L. gilbertsonii), Hen of the Woods/Maitake (Grifola frondosa), and Oyster Mushroom (Pleurotus ostreatus, P. populinus, P.pulmonarius) are really best dried in a food dehydrator. They simply have too much moisture and are apt to mold when attempted to dry in any other way.
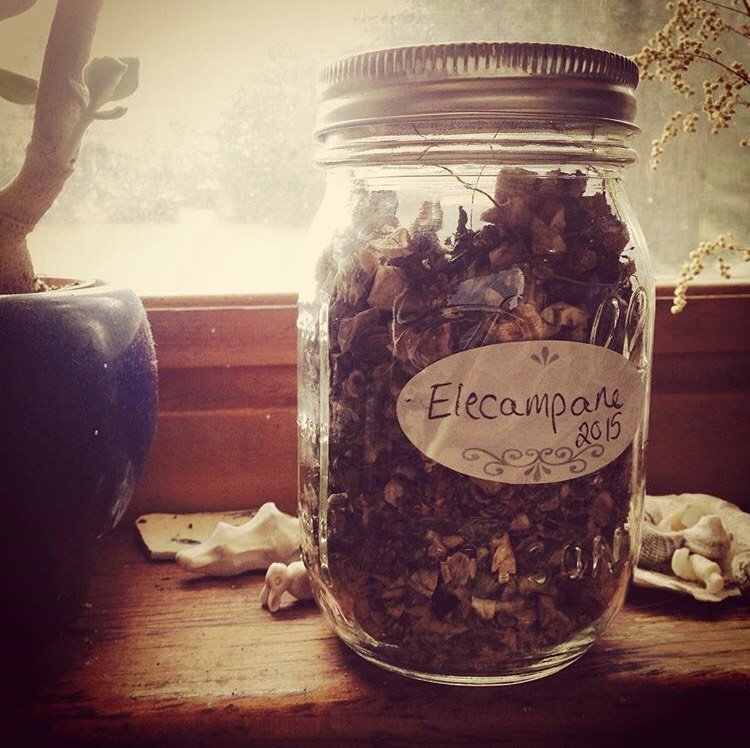
Roots

Roots are the one exception in terms of washing fresh plant material before drying. This is simply due to the circumstances in which they grow- they will of course be covered in dirt! I recommend cutting the leaves off with clippers (reserving if they are medicinal) and first soaking the roots, whole, in a bowl of cold water. Much of the dirt will come-off this way and sink to the bottom of the bowl. Swish them around to help this process. Then remove the roots, put into a strainer and use your sprayer from your sink to wash off any residual dirt. Often no further washing is needed at this point, but if any soil is still on them then you may want to take a scrub brush to them. Once they’re clean remove and pat dry and chop into small pieces on a cutting board. Depending on the plant the root can be very hard, even when fresh. For these difficult to chop roots garden clippers can work well for cutting the root into small pieces for drying. Dry these pieces on a wooden cutting board or surface in as warm and dry of a place as possible- you can even put a fan on them for further ventilation. Spread them so they are in a thin layer and not at all in a pile, so that each piece has contact with the board. Gently run your hand over the roots 1-2 times a day, moving them around a bit, so that they get evenly exposed to the air and dry evenly. They will be ready in 3-7 days, depending on moisture in the air. They should be hard and snap when you break small pieces when they are ready. Roots are very resilient in terms of storage and will often last years when stored in airtight glass jars. Some of my favorite bioregionally abundant roots I harvest most years are Dandelion (Taraxacum officinale)- pictured, Evening Primrose (Oneothera biennsis)- pictured, and Burdock (Arcticum lappa).
Barks

Bark is easy to dry since it doesn’t have a lot of water content. There are a few ways of harvesting bark- 1) It can be scraped off with a knife. If you are using young branches then the outer bark layer will be tender and non-woody and the inner, green cambium layer (the medicinal part) will be attached to it. It’s fine to dry it like this (or make medicine with it), rather than trying to separate the two layers. The young outer bark is not harmful and is so tender itself that it really doesn’t weaken the medicine enough to worry about separating it from the inner cambium layer. 2) You can simply use clippers to cut young, very thin branches, like the Willow (Salix spp) branches pictured, into small little pieces and dry or process for medicine that way. In this method you’re getting a little wood with your harvest but because the branches are so thin it’s a very small wood: bark ratio and again it’s not enough to dilute the medicine so much that it won’t still work. I frequently use this method because of the ease of processing for drying or medicine-making and also because it has a fairly small impact on the tree. 3) You can harvest the mature bark from trees using a draw-knife. This is more advanced, and care must be taken never to girdle a tree because that will kill it. This method is best done in the early spring when the sap is running and the cambium layer will more easily separate from the bark. When the bark is thick and woody, as is the case with older trees it’s best not to have it in your medicine. In terms of drying, bark can be dried on screens, in baskets, or on a wooded surface or cutting board. It generally dries quite easily and should snap in half when it’s dry enough to store.
Berries
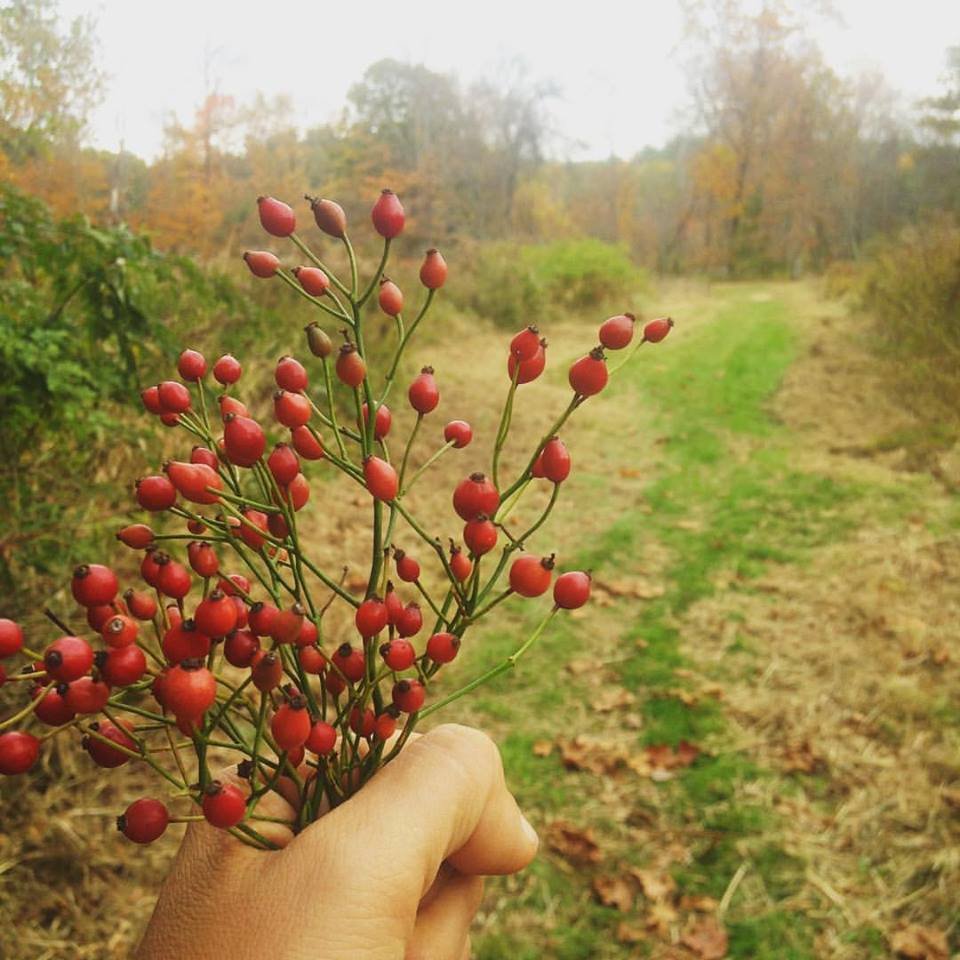
The best method for drying berries depends on their water content. Berries like Elderberry (Sambucus nigra, S. canadensis) and Autumn Olive (Eleagnus umbellata) have such a high water content that they really need to be dehydrated or else they’ll mold. However, medicinal berries that don’t have a lot of moisture to them can be easily dried in baskets or on screens. Notable examples that I often dry in this manner include Rose Hips (Rosa multiflora, Rosa spp)- pictured and Hawthorn Berry (Crateagus spp). As with all plant parts be sure to harvest when there is no residual moisture on them from rain, dew, etc. and place in a basket or in a thin layer on a screen. If they’re in a basket, give it a shake now and then so it evenly dries, or run your hand over berries you’re drying on a screen now and then for the same purpose. They will be ready in 3-7 days under optimal conditions. Berries have a very long shelf-life and will often last years if stored in an airtight glass jar.
Aerial Parts & Flowering Tops

Often the part we use of a medicinal plant is referred to as the “aerial portions” or, if the plant is harvested in flower, the “flowering tops”. This refers to, respectively, the leaf and stem or the leaf, stem, and flower. I like to dry these in a bit different way then the methods described so far. My favorite way to dry this part of the plant is in bundles. I generally make the bundles as I harvest- I find this to be much less work when I go to hang them to dry if I bundle the plants as I go. Depending on the plant I’ll make the bundle anywhere from ½- 1.5 inches in diameter- the more moisture content to the plant the thinner I’ll make the bundle and visa versa. I always use rubber bands to tightly secure the bundles because plants shrink as they dry and lose volume and all too often a bundle that isn’t tightly secured will fall out of its tie, turning your beautiful harvest into a mess on the floor! You can dry these bundles just about anywhere you can hang them- you can hang them from beams, from a wood clothes drying rack, from a make-shift clothesline you hang from the ceiling or string-up in a room, or anywhere else you can think of for your space!
Just like the other plant parts you want to dry your plants in an area that is warm, dry and has ample ventilation- putting a fan on it while it dries sometimes speeds the process. In optimal conditions they will be ready in 3-7 days and should crumble in your hands when they’re dry enough to process and store. Sometimes these plant parts need to be garbled- the herbal word for separating the medicinal part from the non-medicinal part- often separating woody stems from leaves and/or flowers. This is best done by hand over a bowl or sheet, discarding the stems and composting or saving for broths or incense if that makes sense for that individual plant. Garden clippers work well for cutting-up the medicinal parts of the plants into smaller pieces to be stored for tea. Then put the garbled, medicinal portion into your jar or ziplock. The aerial portions hold-up to storage better than flowers but not quite as well as roots and berries. If you’ve had it for a while check for freshness by tasting or smelling it- if it’s an aromatic plant it should still have a strong smell and if it isn’t an aromatic plant it should at least still have a strong taste.
Storing Herbs
Herbs are best stored in glass jars with tight-fitting lids out of direct light and out of intense heat. They don’t have to be in dark cabinets as long as wherever they’re stored doesn’t get bright, direct light. They can also be stored in heavy duty freezer ziplocks however they won’t last as long in plastic so I recommend storing more fragile plant parts such as flowers in glass if possible. Storing in ziplocks can be helpful if space is at a premium as they’ll take up much less room when stored this way, as opposed to jars. If you’re concerned that there were insect eggs in some of your plant material when you harvested it and you don’t want them to hatch and ruin your herbs you can flash freeze them by putting the jar or ziplock of herbs in a freezer overnight- this is what large bulk herb distributors do with all their herbs. I only have this problem with Red Clover (Trifolium pretense) so I always flash freeze it and have never had this issue with any other herb ever, but it’s still a good method to know about. Always be sure your herbs are completely dry (they should snap or crumble in your hand) before you put them in a jar or bag- otherwise they will mold. If you like using herbal powders it’s best to powder your herbs in small-batches as-needed rather than powdering it all at once for storage. This is because powders have a shorter shelf-life due to their increased surface area which leads to faster oxidization and loss of essential oils. I use a coffee grinder reserved just for herbs and it’s a simple way to powder small amounts of herbs as-needed.
Herbs you harvest and dry yourself will have a much longer shelf-life than anything you buy from an herb shop or distributor, the exception being small herb farms and small-batch growers. This is because most herbs on the commercial market (even organic ones) often sit in a warehouse for 6-12 months before even reaching the herb shop or your door! For this reason I consider store-bought herbs to have about a 1 year shelf-life and home-dried ones to last anywhere from 1-3 years and even longer. It’s really all about using your senses- Does it still smell fresh? Does it look vibrant? Or is it brown? How does it taste? Like it did when you first put it in the jar? Or is it tasteless of weak? By using organolepsis- using our senses to gather information about the medicinal action of a plant- we can decide if the herb is still vibrant enough to use or needs to be composted. In general in terms of plant parts flowers have the shortest shelf-life, followed by aerial parts and flowering tops, and then berries. Roots, barks, and mushrooms all are very shelf-stable and is home-harvested and dried can often last for years.
Trouble-Shooting
Sometimes things don’t go as planned when we’re drying herbs! Here are a few common problems and some solutions.

My plants were dry but I didn’t get them into a jar right away and now the weather is wet and/or muggy and they absorbed some of the moisture from the air and are no longer dry enough to put into a jar.
Solution: If there is humidity and the plants seem soggy don't worry, simply wait it out and once the humidity is gone the herbs will dry-out and be ready for processing then!
I don’t have a house, my house is too damp to dry herbs in, I’m traveling, or on a road trip. How can I dry herbs?
Solution: There are a few other time-tested methods for drying herbs. Many herbs dry well in a brown paper bag with the top rolled down and left in a hot car on a sunny day or the brown bag can also be put on the dashboard in the sun if you are traveling. Herbs often dry very quickly this way and can be stored in the brown paper bag until you can get them into a jar or ziplock for long-term storage. The caveat with this method is that too much time in a hot car will start to degrade the essential oils so that’s just something to be aware of. Here’s another method that can work in a tent/house/van- string-up a piece of breathable fabric (cotton, linen, etc) making a little canopy with it and dry your herbs in there as long as the over-all environment is warm and dry.
My herbs are dry but I don’t have time to garble them and put into jars or bags right now
Solution: No problem! You can store your herbs in a brown paper bag with the top rolled down in a warm dry place until you have time to process them and store long-term in jars or ziplocks. It’s ok to store herbs for months this way if needed
