Fall Kimchi
Fall is for kimchi-making in my house. The late summer/early fall abundance of vegetables available this time of year provides the perfect diversity to make an amazing fall ferment! A nice big batch made now will last well into winter, so it's also a way to extend the window of eating local. Plus, batches made now capture the colors and flavors of summer and fall- such a comfort in the long winter months.
Why Ferments?
Our relationship with microbes is amazing and complex. We know by now that having a good array of gut flora is pretty much the key to good health on so many levels, or at least a HUGE piece of the puzzle. Lacto-fermented vegetables are teeming with beneficial probiotics and prebiotics our bodies need for optimal health.
Gut dysbiosis (simply put, more "bad guys" than "good guys" comprising our gut flora) has been linked to everything from mental health disorders to autoimmune issues and immunity in general, to obesity, food intolerances, mood (including depression) and so much more. Our ancestors were ingesting probiotics all the time- mostly from the soil (which is why gardening with no gloves and just lightly or not washing your vegetables is great for your gut health!).
Having healthy flora today is a challenge in the age of anti-bacterial everything and the advent of processed foods, but adding lacto-fermented foods into our diet on a daily basis can help SO much, and is my preferred way to get probiotics. I'm also careful not to be pre-occupied with sterility and avoid anti-bacterial soaps, sprays, and so on and am sure to also spend plenty of time in the dirt! A recommendation I make to virtually every client I see is to think of ferments as a condiment that you have with every meal. And here's a tip to be sure you're getting a full array of those beneficial microbes- if you're buying it, switch-up the company you buy from now and again. And if you make it be sure to swap with friends. Every ferment has its own unique culture and probiotic profile.

FALL KIMCHI
Cabbage (You could use Napa/Asian Cabbage too, but regular cabbage stays more crunchy as it ferments)
Ginger
Garlic
Scallions
Carrot
Daikon Radish
Watermelon Radish
Burdock
Sunchokes
Sea Salt (unrefined!)
Other nice additions: turmeric, seaweed, and hot peppers (if you like it extra spicy). You can add a can of sardines blended-up first in a food processor, and then added to the veggie mix, if you like one with fish sauce, which is traditional in kimchi
NOTE: All these vegetables can be procured and grown locally- here in the valley, Old Friends Farm in Amherst, MA is growing ginger and turmeric too!
DIRECTIONS: Kimchi is basically a spicy version of saurkraut, with a larger diversity of vegetables added. This recipe can be adapted to use whatever veggies you happen to have an abundance of, your palate and preferences, and so on. As a base, start with the cabbage, ginger, and garlic, and then take it from there and let your creativity run wild!
Chop it all up...
The thinner the better. Grate the garlic and ginger if you can. In terms of proportions- about 1 head of garlic to one head of cabbage…and equal amounts of ginger to garlic. Add the rest of the veggies in any proportion desired- basically to taste. Next add the salt. About 2 ½-3 tbsp: 5 lbs of veggies is a good place to start, or you can do it to taste. The saltier it is, the crunchier your ferment will be, so keep that in mind. As you get more experienced you will not need to weigh it at all, and can just add the salt to taste, but it's a good idea to weigh it in the beginning so you know what it tastes like with the right amount of salt.
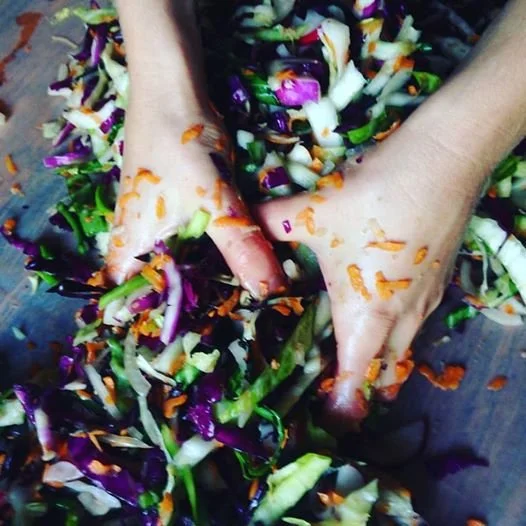
Massage it to release the vegetable juices...
You can massage this all by hand, like we did, or you can pound it in a stone crock or food-grade 5 gallon bucket. I vastly prefer massaging by hand! It's a wonderfully visceral and sensuous experience, and I first learned to make kimchi this way from my dear friend Brittany Nickerson at Thyme Herbal. (And on that note- make kimchi with friends! It's way more fun!) Keep massaging or pounding the veggies until they start to bruise and release their juices. You can do this in a bowl, or I keep a plastic sheet handy and put it right over my table and use this as a work space- the idea here being you want to capture those juices! Next add it all (veggies + juice) to your crock or jar (I use 1/2 gallon glass mason jars), firmly pressing your veggies in so there’s not a lot of air space. If the juices don’t cover the veggies, add some brine (salt water). 1 ½ tbsp sea salt to 4 cups warm water is a good ratio to use- be sure the salt dissolves completely! Cover your veggies completely with the brine so that the liquid goes right up to the rim.
Let it ferment...
Next, cover your jar with a double layer of cheesecloth and let it sit! You can add more brine if needed. Foam may form and you can scrape it off if you want, but it's not necessary. If any pieces of veggies are sticking-out they might mold, but just pick them out and the rest of the veggies in the brine will be fine! Fermentation time varies. Batches I make in the winter can take up to 19 days or longer to ferment because it's colder......warm months mean a shorter fermentation time. A good trick is to place your jar on top of the fridge to ferment in the winter months because it stays evenly warm, without day and night fluctuations in temperature. The best way to know it is done is to taste it! It should taste sour like pickles- and delicious! Store in the refrigerator.
USE: Ferments are wonderful additions to most any meal, and their sharp sour flavor provides a sharp contrast to almost any dish. I love kimchi on sandwiches, with eggs, in salads (especially with a can of sardines added), in soups (add at the end so you don't kill the beneficial organisms). and alongside most any meal really. The eassiest way to incorporate them into the diet is to think of them like a condiment you have with every meal, which is ideal. I consider ferments “food as medicine” and the good results are undeniable!
Enjoy!